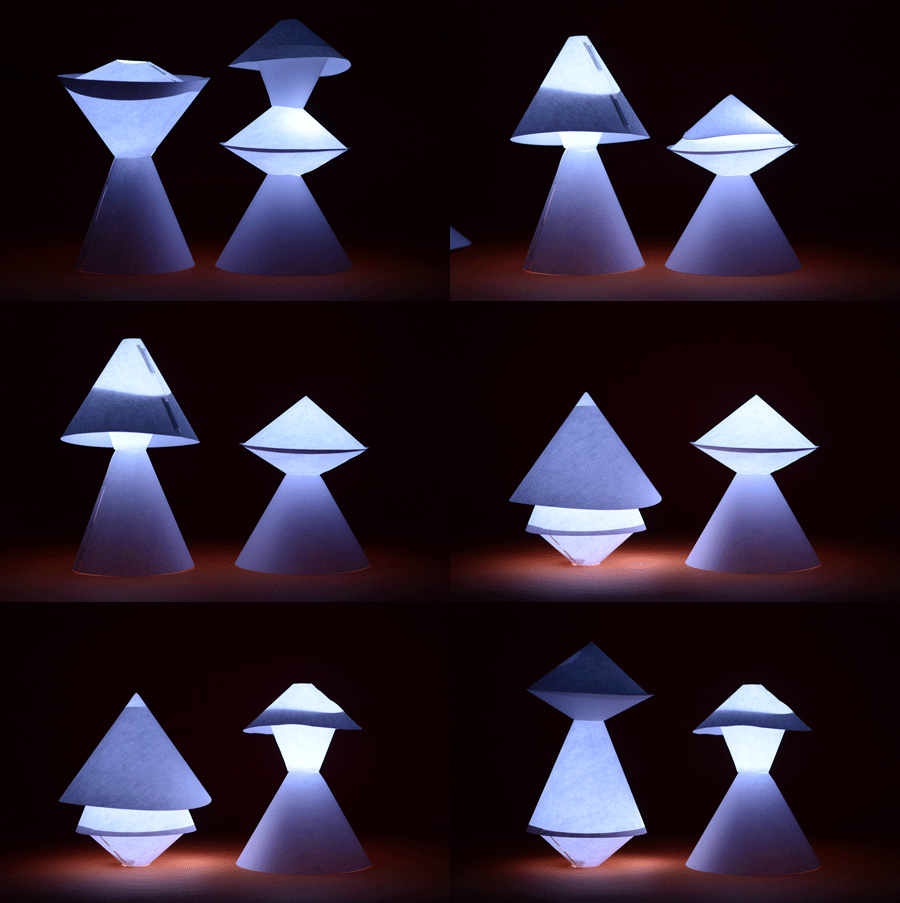
Explo DIY: Make a Paper Cone Nightlight

What can you make with a sheet of paper? You could: fold it into a paper airplane, an origami swan, or even a telescope. But what if, with a few cuts, you could transform it into something that's as useful as it is beautiful? Enter the paper cone nightlight, a lamp you can make with paper and just a few small parts.
The components are simple: a few sheets of white paper, some scissors and tape, and a few electrical components from Adafruit, an open-source hardware and electronics company. But the results will be anything but.
What You'll Need
- 3.7 volt Lithium Ion Battery ($5.95 at Adafruit)
- Micro Lipo with MicroUSB Jack USB Li-Ion Charger ($6.95 at Adafruit)
- One JST 2-Pin Cable ($.75 at Adafruit)
- Diffused White10mm LED light ($.50 at Sparkfun; $11.95 for a 25-pack at Adafruit)
- Letter-sized white office copy paper (Ideal: 20lb with a brightness of at least 92)
- Scissors and/or an X-Acto Knife
- Transparent Tape/Scotch Magic or Similar. (Optional)
How to Build a Paper Cone Nightlight
Step 1: Cut out and assemble your paper cones
A: On sheets of white office paper, draw and cut out circles of different sizes. Make your largest circle as big as you can on the paper and your smallest circles about half that size (two circles on a single sheet of paper). If you can fit three circles on a single sheet, your circles are too small. Each circle with make one cone. You can make your nightlight with just one cone or by stacking as many as you like. Just for fun, let's start with four.
B: Once you've cut out the circles, remove a pizza slice from each one. Your slices may be as large or as small as you like. The size of each slice will affect the height of the cone, once you roll the paper into a cone shape.
C: Make your cones by connecting the two straight edges to each other. Align one straight edge with the other and place a piece of scotch tape across the joint. In order to stack your cones, snip off the tip of the cone. You can do this by removing a smaller circle around the center of the larger circle, creating what's called a flat-top cone.

Step 2: Wire Your LED
A: Strip 3/4” of the red and black coating from the ends of the JST cable wires. If you don’t have a wire stripper, you can use a knife to cut through the coating. Pull the coating off by squeezing it between your fingernails.
B: Attach the red lead of the JST Cable to the “BAT” terminal on the Micro Lipo board. Attach the black lead to the “GND” terminal. If you have a soldering iron, solder this connection. If you don’t, wrap the wires around the terminals making sure the wires do not touch each other.
C: Connect the battery to the Micro Lipo board and plug in the LED. Plug the positive lead (the longer lead) into the red wire socket and the negative lead into the black wire socket. The LED should immediately light up. To turn off the light, unplug the LED. (To charge the battery, connect a micro USB cord from your computer to the USB port on the Micro Lip board.)

Step 3: Assemble Your Light
A: Turn on your LED and place it on a table.
B: Cover the LED with one of your paper cones. Note how the light changes the look of the cone. If you put the LED under a flat top cone (a cone with a hole at the top) light will escape through this hole.
C: Try stacking different sized cones on top of one another by altering the direction each cone is pointing.
D: Once you have a tower you like, try repositioning the LED inside the tower.
When your nightlight is complete, it will look something like these — or whichever configuration of cones you can dream up:

Merry Making!
Downloadable Instructions + Templates
 To make the assembly process as simple and straightforward as possible, we've put together these instructions and templates to get you started. In this downloadable PDF, we've included a few pages with starter circles, which have built in tabs and slots. If you have access to an X-Acto knife (or a laser cutter), you can skip the tape and use the tabs/slots instead.


